
This article will guide you through the process of adding users and adjusting user permissions within the ePayPolicy Dashboard. With our step-by-step instructions, you'll be able to efficiently control user access.
1. Login to the ePayPolicy Dashboard at https://app.epaypolicy.com/
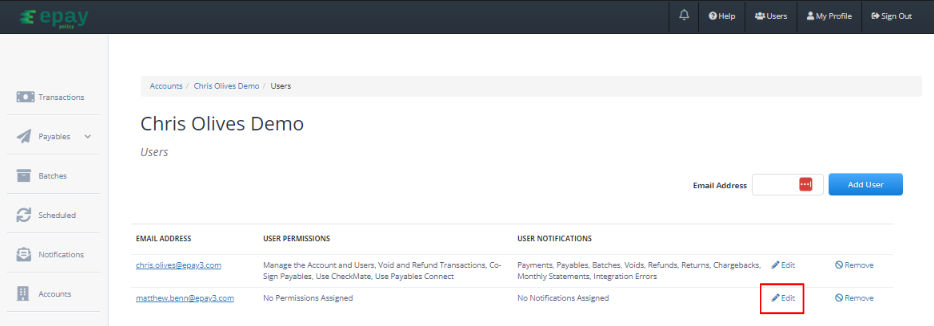
4. Type an Email Address into the text field on the right.
.png)
5. Click Add User. You will now see the newly added user in the list of users with no permissions set. The user added will get an email with instructions to set up a password and login to the ePayPolicy Dashboard.
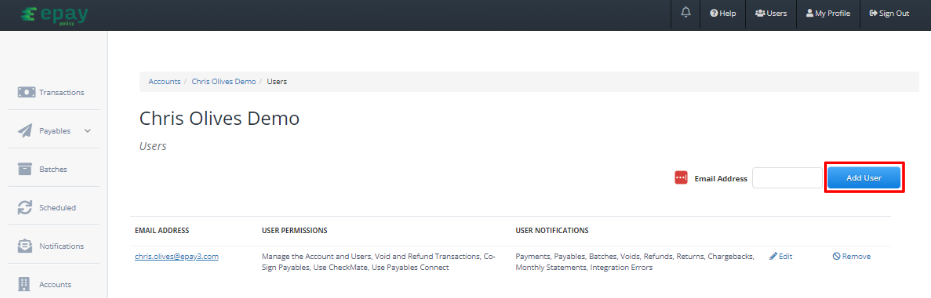
6. Click Edit to adjust permissions. A pop up window will appear. You can enable a permission by clicking No. This will slide the selection to the Yes position.
# |
Name |
Description |
| Permissions | ||
| 1 | Manage the Account and User | Enables a user to add additional users, as well as, edit and remove users. |
| 2 | Co-Sign Payables | Enables a user to function as a required Co-Signer for authorizing outgoing payables. The user will get email and dashboard notifications when a co-signer is required. |
| 3 | Void and Refund Transactions | Enables a user to void or refund for any transaction. |
| 4 | Can use CheckMate | Enables a user to access the CheckMate feature within the Dashboard. |
| 5 | Can use Payables Connect | Enables a user to access the Payables Connect feature within the Dashboard. |
| Notifications | ||
| 6 | Payments | The user receives an email notification each time a payment is received. Each user has access to edit this permission for their own account. |
| 7 | Payables | The user receives an email notification each time a payable is completed. Each user has access to edit this permission for their own account. |
| 8 | Batches | The user receives an email notification each time a batch is received. Each user has access to edit this permission for their own account. |
| 9 | Voids, Refunds, ACH Returns, and Chargebacks | The user receives an email notification each time a void, refund, ACH return or chargeback occurs. Each user has access to edit this permission for their own account. |
| 10 | Monthly Statements | The user receives an email notification each time a monthly statement is available. Each user has access to edit this permission for their own account. |
| 11 | Integration Errors | The user receives an email each time an integration error occurs. This setting is only visible on accounts that have an integrated payment page. Each user has access to edit this permission for their own account. |