
What is ePayPolicy's Payables service?
ePayPolicy's Payables service allows you to effortlessly send funds to any agency, broker, MGA or premium finance company across the industry for less than the cost of a stamp! To bolster security, our system typically requires a separate co-signer to approve each payable payment. However if you find yourself as the sole user on your account, fret not - we've got you covered. Simply reach out to us at support@epaypolicy.com to have the co-signer requirement disabled.
In this article, we will walk you through the steps to initiate and co-sign a payable payment.
How to Initiate a Payables Payment
1. Click Payables in the left navigation menu of the ePayPolicy Dashboard.
2. Select Single from the drop down menu.

3. In the Search Criteria field, enter your recipient's name or email address.
4. [Optional] Click the Bookmark Icon to the left of the account name to pin the recipient to the top of recipients list for easy access in the future.
5. Click ‘Pay Now’ to the right of the account you would like to which you would like to send a payment.

6. You will be directed to the Payment Details Page, where you must provide the following information:
- Notes: Add any relevant information the recipient may require, such as account number or invoice details.
- Co-signer(s): Use the drop down menu to select a ePayPolicy user with co-signer authorization. If needed, you can manage user permissions to grant co-signer status.
7. Click Next on the Payment Confirmation Page.
8. Once you have verified all the information is correct, click Initiate.
9. Congratulations! You have successfully initiated a payable payment. The transaction will appear as "Pending Approval" on the transaction tab of the ePayPolicy Dashboard. An email will also be sent to the co-signer for payment approval.
Co-Signing a Payables Payment
1. Begin by logging into the ePayPolicy Dashboard.
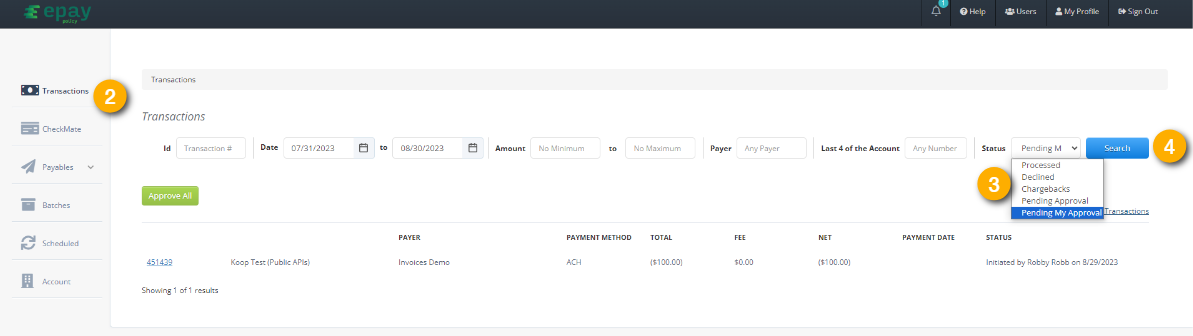
2. Click the Transactions tab in the left navigation menu
3. Click select Pending My Approvals from the Status dropdown.
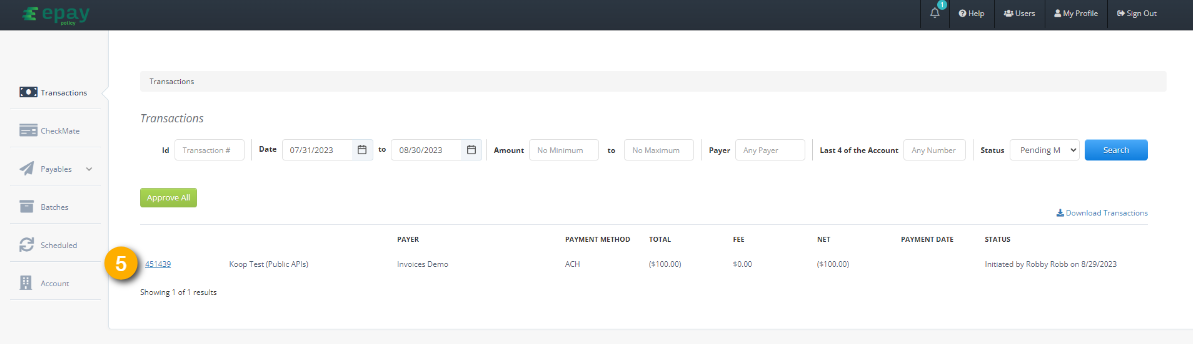
4. Click Search to display pending payments.
5. To review a specific payment, click on the Transaction Number.
6. Click Approve.
7. A pop-up will appear, asking for your confirmation. Click Confirm to proceed.
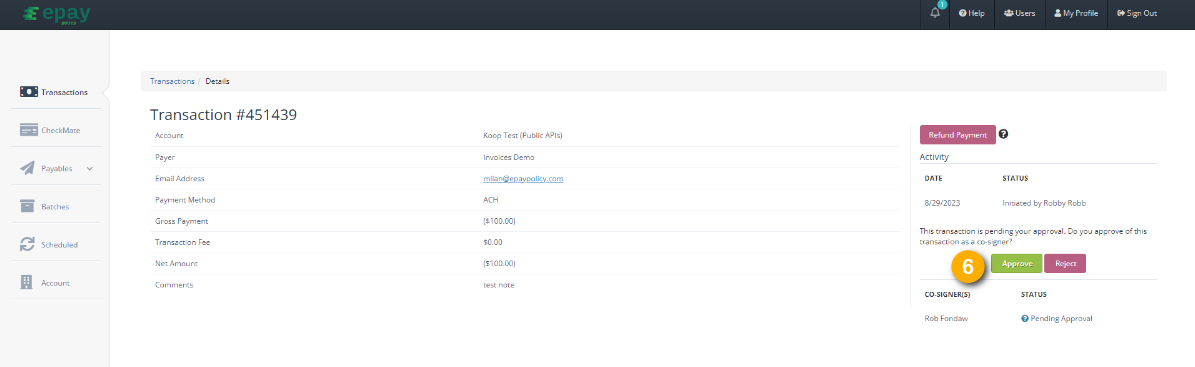

8. Once the payable has been approved, both the co-signer and the initiator receive an email receipt.